
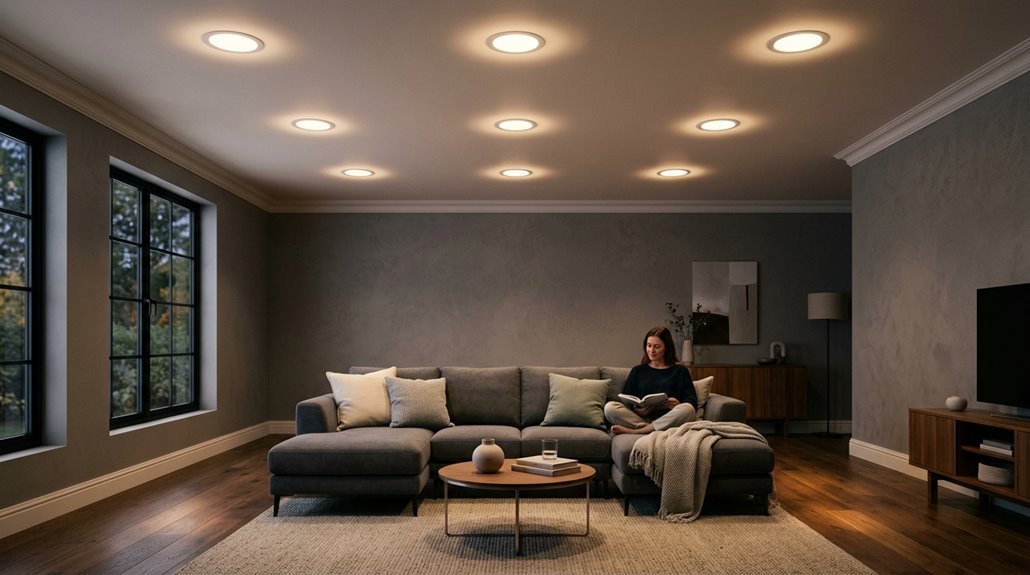
Installing Recessed Lights in Your Living Room

If you buy through links on our site, we may earn a small affiliate commission to help support the blog - at no extra cost to you. It never influences our product selection process. Thank you!
Product prices and availability are accurate as of the date/time indicated and are subject to change. Any price and availability information displayed on Amazon at the time of purchase will apply to the purchase of these products.

I’ll space my lights five feet apart on eight-foot ceilings for even coverage, then position each housing between two joists, never under them. I mark center points with a pencil and verify from the attic to avoid obstructions before drilling carefully with a hole cutter. Next, I secure the bar hangers by tapping them tight against joists, wire the fixtures in a chain matching hot-to-hot and neutral-to-neutral, then install trim rings and bulbs. Finally, I restore power and test for consistent brightness across the room. Proper spacing and verification prevent callbacks from uneven lighting or fixture failures.

Turn Off Power and Gather Your Tools

turn off power gather tools

Before touching a drill or making your first ceiling cut, prioritize safety to avoid injury and ensure quality results.

Power Down First

Go to your circuit breaker and flip the switch for the room. Test a nearby outlet to confirm the power is actually off.

Collect Your Arsenal

Gather your essential gear: measuring tape, pencil, drill, and recessed light hole cutter. These measuring tools help you achieve accurate placement.

Gear Up

Always wear safety gear. A mask and goggles are essential. Drywall dust and insulation particles can damage your eyes and lungs, causing respiratory problems and irritation that could persist long after the project ends.

Space Lights 5 Feet Apart for Even Coverage

five foot spacing for even lighting

How do you avoid creating dark spots or bright patches in your living room? Spacing matters tremendously.

I measure carefully across my living room and dining room, placing lights exactly five feet apart. Here’s what I do:

  • Mark center points with a pencil before cutting any holes
  • Use a measuring tape to verify consistent spacing on either side of the room
  • Position housings between ceiling joists for stable support
  • Check for gaps that create dark zones between fixtures
  • Prevent overlapping light pools that waste energy

For eight-foot ceilings, this five-foot spacing ensures uniform coverage without frustrating shadows. I’ve made mistakes rushing this step, and taking time upfront saves me from patching drywall later. Your evenings spent reading or entertaining will feel perfectly lit when this spacing is done correctly.

Position Each Housing Between Two Joists

position between joists for flush installations

Position Each Housing Between Two Joists

Locating your recessed lights between ceiling joists rather than directly under them ensures a solid installation. Attempting to position lights under joists creates mounting complications and prevents housings from sitting flush against the ceiling.

Position recessed lights between joists, not under them, to ensure flush installation and avoid mounting complications.

Finding the Sweet Spot

Use your measuring tape and straightedge to locate joist centers, then mark spots directly between them. This approach prevents mounting complications and ensures your housings sit flush against the ceiling.

What I Check First

Before cutting, verify:

  • Housing fits completely between two joists
  • No HVAC ducts or plumbing lurk overhead
  • Your mark stays at least six inches from any joist edge

Careful positioning keeps your installation secure and prevents costly mistakes during installation.

Mark Locations and Check From the Attic

I’ve learned the hard way that rushing this step leads to costly mistakes. I mark each light’s center with a pencil first, then grab a wire or coat hanger to poke through those marks and verify I can actually access the spots from above. Once I’m up in the attic, I double-check that my planned locations won’t bump into joists or HVAC ducts, which saved me from cutting holes in all the wrong spots. This takes maybe twenty minutes, but it’s significantly better than cutting a hole only to discover you’ve hit a duct or can’t fit the housing between the joists.

Marking Precise Light Positions

Where exactly should you put those recessed lights? I’ll walk you through my marking process, the most critical step in this installation.

My Essential Marking Steps:

  • Use a measuring tape and pencil to mark each light’s center between ceiling joists
  • Insert a wire or coat hanger through pencil marks as a physical reference guide
  • Verify attic marks align with clear space, avoiding joists and HVAC ducts
  • Follow the five-foot spacing rule on eight-foot ceilings for even illumination
  • Return downstairs to confirm marks match your planned layout

Always double-check from below first. Those pencil marks need visibility and accuracy. Inaccurate measurements create problems when cutting holes. Taking time during the marking phase prevents costly errors in subsequent steps.

Verifying Joist and Duct Clearance

How do you know if those pencil marks you’ve made are actually safe to cut?

I grab a wire hanger and poke it through each mark to probe upward into the attic. This simple trick reveals what’s hiding above your ceiling. I trace where that hanger ends up, checking for joists, HVAC ducts, or other obstacles blocking my planned light locations.

What I’m looking for:

  • Clear space between two joists
  • No ducts or pipes in the way
  • Adequate room for the light housing

If I find a joist or duct blocking my mark, I shift the location slightly while keeping it between joists. This ensures even lighting and prevents frustrating installation problems later. Checking now avoids significant complications during installation.

Wire Insertion and Attic Confirmation

Now comes the moment where my pencil marks get their real test. I send a wire straight up through each one, pushing a wire or old coat hanger through each marked spot and listening for it to poke through the ceiling.

My verification checklist:

  • Push wire through each pencil mark carefully
  • Head to the attic to spot where it emerges
  • Confirm the wire lands in open space, not near joists
  • Check for HVAC ducts blocking my path
  • Verify enough room exists for the housing unit

I climb up there with a flashlight, tracing each wire. If a wire pokes through near a joist or duct, I mark a new location below. This attic visit prevents cutting mistakes. Once I confirm everything aligns perfectly, I’m ready to cut.

Drill Openings With a Recessed Light Hole Cutter

Now I’m ready to cut. Picking the right hole cutter size and using the proper technique makes the difference between a clean opening and a disaster. I’ll share exactly how I approach this step, from selecting my tool to executing cuts that fit my fixtures perfectly, so you can avoid the mistakes I made when I first rushed through this part. This section covers what you need to know to drill those openings correctly.

Selecting The Right Tool

When I first tackled recessed lighting, I grabbed whatever drill bit I had lying around, which resulted in jagged, uneven holes.

Using a recessed light hole cutter makes a measurable difference. What matters most:

  • Match the cutter size to your can’s housing outer diameter for a snug fit
  • Verify joist placement before drilling to avoid structural damage
  • Check for hidden obstacles like HVAC ducts or plumbing lines
  • Use slow drill speed to prevent drywall chipping and keep edges smooth
  • Wear safety gear; goggles and a mask protect you from dust

Selecting the right tool transforms results from poor installations to professional-quality work.

Executing Precise Cuts

With the right tool in hand, I’m ready to turn those pencil marks into perfectly sized holes. My planning pays off here. I start by inserting a flexible wire through each mark to check for obstructions behind the drywall. This simple step prevents hitting hidden wires and insulation snags.

StepActionSafety Check
1Mark locations between joistsVerify spacing with measurements
2Insert test wireConfirm no obstacles exist
3Pilot hole firstCheck for wires and insulation
4Complete full cut steadilyWear mask and eye protection

I make a pilot hole before committing to the full cut. This confirms I’m not hitting anything nasty. I keep the power off and wear my mask. Drywall dust spreads throughout the workspace.

Mount Housings and Anchor Bar Hangers

Getting those recessed cans secured properly is where I realized the difference between a sloppy installation and one that will actually last. I’ve learned this through experience.

What works:

  • Fit the housing into your pre-cut ceiling hole first
  • Extend bar hangers to contact both joists firmly
  • Tap hangers with a hammer until they grip tight
  • Center each can between joists for consistent spacing
  • Check that everything’s level and flush against the ceiling

Skipping these steps causes sagging and gaps that require costly repairs. When you tap those hangers into place, you’re anchoring the entire fixture. Ensuring they won’t budge means rock solid contact with your joists prevents future movement and structural failure.

Connect Fixtures Together in a Chain

How do you make multiple recessed lights work together as one system? The process is straightforward and follows basic electrical principles.

The Basic Setup

Wire runs from the power source into the first fixture’s junction box. Connect hot to hot, neutral to neutral, and ground to ground using wire nuts. Repeat this process at each subsequent fixture, creating one continuous electrical path.

Key Things I Watch For

  • Match wire colors carefully (hot stays hot, neutral stays neutral)
  • Never splice outside junction boxes
  • Count conductors to avoid overfilling boxes
  • Secure all connections tightly

Before You Finish

Tuck conductors neatly, test continuity, then mount trim and bulbs. This approach keeps everything safe and ensures all fixtures function as one integrated system.

Install Trim Rings and Screw In Bulbs

Once all wiring is secured and every fixture connected, trim rings transform recessed lights from unfinished ceiling holes into polished installations.

Securing Your Trim Rings

Trim rings serve essential functional purposes beyond aesthetics:

  • Masking gaps between ceiling and housing
  • Creating a polished, professional appearance
  • Holding reflectors flush with your ceiling
  • Protecting against dust and debris
  • Completing your lighting design

Installing Bulbs Properly

When screwing in bulbs, ensure they’re completely seated without overtightening. Match your bulb type (PAR, BR, or A19) to your trim and housing rating. For living rooms, warm LED bulbs at 2700K provide the desired cozy ambiance.

Restore Power and Test for Even Brightness

Flip that circuit breaker back on to test if your recessed lighting works properly.

Turn on all your lights and scan the ceiling for uniform brightness. Look for dark spots that indicate uneven installation. Each fixture should glow consistently across your living room.

Check each light individually for flickering or buzzing, which signal a problem. Make sure bulbs are seated properly, as loose bulbs prevent optimal performance.

Feel the housings carefully after a few minutes. They shouldn’t be hot. If brightness looks uneven, adjust trim positions or swap in lower-lumen bulbs to balance the light output.

Leave a Comment